 Pokemas Lab
POKEMAS LAB · DAMAGE CHALLENGE
Pokemas Lab’s Team Firepower Explorer
Find a Fighting team from your roster
This round’s weakness is Fighting. A useful starting point is to combine Fighting Zone, enemy Defense reduction, and a first Support EX sync move.
This article assumes a Fighting-weak battle against one opponent and presents four teams to suit different rosters. As in our previous three-opponent Psychic article, each team includes a link to its saved calculation and selected sync grids in Team Firepower Explorer.
These are not verified battle scores or a strongest-team ranking.
These team ideas use released sync-pair data. The model compares one attack per pair after a preparation sync move, plus a damage sync move. It does not include actions within the time limit or some conditional multipliers. A one-million score is not guaranteed.
Start with one damage dealer and two support slots
In a single-opponent battle, all-target attacks cannot score hits on three opponents at once. Choose one main damage dealer, then fill a damage-setup role and a sync countdown role. If regular attacks or buddy moves are a major source of damage, also compare teams with more damage dealers.
| Setup | What to check |
|---|---|
| Attack or Sp. Atk and critical-hit rate | Match buffs to the attack category. If the main damage dealer cannot fully buff itself, fill the gap with support. |
| Enemy Defense or Sp. Def | Lower Defense for physical attacks or Sp. Def for special attacks. Also check any extra sync move scaling conditions. |
| Fighting Zone | Time it for sync moves and other big attacks. A Zone set at the start may expire while you are still preparing. |
| Fighting Type Rebuff reduction | Check your roster for options such as Bianca (Champion), Barry & Infernape, or Arc Suit Korrina. |
| First Support EX sync move | Build sync buffs with a 6★ EX Support sync pair, or one with its Support EX role unlocked. |
| Sync countdown | Use sync countdown reduction and short support actions to fit more sync moves into the time limit. |
Support pairs of other types can also join the team. Non-supereffective attacks deal zero damage, but buffs, field effects, and sync countdown reduction still have a role. Red’s Normal-type sync move can therefore be useful for building initial sync buffs.
Four teams to suit your roster
These are options for different roles, not a score ranking. The saved calculations use move level 5, 6★ EX and EX roles enabled, no Superawakening, and connected grids within 70 energy. Adjust them to your own investment.
1. Juliana: combine sun with EX Fighting Zone
 Juliana & Koraidon (Apex Build)Strike / EX Tech
 Kieran & Hydrapple (Tera Type: Fighting) (Terastal Form)Field / EX Tech
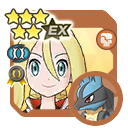 Arc Suit Korrina & Mega LucarioMulti / EX Support
For players who want to focus on strong regular attacks and buddy moves. Combine Juliana’s sun, Arc Suit Korrina’s EX Fighting Zone and Kalos Circle, and Kieran’s Sync Move ↑ Next support.
- Juliana: Use Sparkling Memories! to raise Attack and critical-hit rate, then use S Collision Course while the weather is sunny. It lowers the opponent’s Defense by three stat ranks, helping subsequent physical attacks too.
- Arc Suit Korrina: The first successful buddy move sets EX Fighting Zone. Almighty Rock Smash prepares the physical circle and move boosts, while Almighty Aura Sphere prepares the special versions. Prioritize physical support for Juliana.
- Kieran: Red-Ripe Sunny Day refreshes sun and raises all allies’ Sync Move ↑ Next effect by two ranks. It requires at least 50% HP, so plan healing to maintain access.
Battle plan: Set up Juliana and use Korrina’s buddy move → use Korrina’s first sync move for Mega Evolution and Support EX sync buffs → use Juliana’s buddy move and sync move. Before a big hit, check that sun, EX Fighting Zone, and the physical circle are still active.
Watch out: Move boosts are consumed when used. Account for attacks that spend them during setup. Korrina’s buddy moves are locked when she is in a pinch.
Open this team’s calculation and selected grids ↗
Calculation settings and unmodeled effects
Setup sync: Arc Suit Korrina& Lucario. Damage sync user: Juliana & Koraidon (Apex Build). Selected grid energy is listed below.
- Juliana &Koraidon (Apex Build): 70/70
- Kieran & Hydrapple (Tera Type: Fighting): 67/70
- Arc Suit Korrina &Lucario: 63/70
Effects not automatically modeled: Inertia, 1st Status P-Move MP 0: Physical Boost 2, Kitakami Sunlight, Mega Evolution Successor.
These grids were chosen by comparing automatically generated candidates with no grid selected. They are not guaranteed to optimize battle tempo, gauge use, or Zone uptime. Panels discussed in the article are options to consider; the shared grid may not include all of them together.
2. Hop: lower Defense and repeat boosted sync moves
 Hop (Champion) & Zapdos (Galarian Form)Tech / EX Support
 Red & SnorlaxSupport / EX Sprint
 Colress & KlinklangTech
For players who want to focus on sync move damage. Hop provides Fighting Zone and damage, Red provides Supereffective ↑ Next, and Colress handles Defense reduction and paralysis.
- Hop: His sync move becomes stronger as the opponent’s Defense falls. If you select grid passives such as Inertia or Slo-pponent Sync 5, also raise his Speed and lower the opponent’s Speed.
- Red: Use his first 6★ EX sync move to build sync buffs, then give Hop the Supereffective ↑ Next effect with You and Me! Apply it just before Hop’s sync move so another attack does not consume it.
- Colress: Screech lowers Defense by two stat ranks, so three uses reach −6. After Thunder Wave inflicts paralysis, repeated attempts against the already-paralyzed target are another way to advance the countdown. Check the grid for gauge recovery and other gauge support you need.
Battle plan: Prepare Defense reduction, paralysis, and critical-hit rate → use Red’s first sync move → set Hop’s Fighting Zone → give Hop You and Me! → use Hop’s sync move. Continue advancing the countdown and refresh the Zone as needed.
Watch out: Roaring Thunderous Kick unlocks after the team reduces its sync countdown by six, and locks again after use. It helps lower Defense and Speed, but adjust the order if you want to save Supereffective ↑ Next for a sync move. Failed paralysis attempts are a countdown tool, not a damage source.
Open this team’s calculation and selected grids ↗
Calculation settings and unmodeled effects
Setup sync: Red& Snorlax. Damage sync user: Hop (Champion) & Zapdos (Galarian Form). Selected grid energy is listed below.
- Hop (Champion) &Zapdos (Galarian Form): 70/70
- Red &Snorlax: 69/70
- Colress &Klinklang: 70/70
Effects not automatically modeled: Inertia, Slo-pponent Sync 5, Smarty-Pants, Chase Down 3, Strongest Professor Thunderous Kick, Dizzying Power.
These grids were chosen by comparing automatically generated candidates with no grid selected. They are not guaranteed to optimize battle tempo, gauge use, or Zone uptime. Panels discussed in the article are options to consider; the shared grid may not include all of them together.
3. Rei: follow Cynthia’s sync move with a buddy move
 Rei & Decidueye (Hisuian Form)Sprint / EX Strike
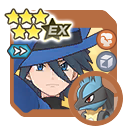 Riley & LucarioSprint / EX Strike
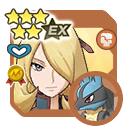 Sygna Suit Cynthia (Aura) & LucarioSupport / EX Sprint
For players who want to use Rei and Riley together. Cynthia provides Fighting Zone and the first sync move, leading into Rei’s buddy move and sync move, plus Riley’s Max Move.
- Rei: Our Hearts Are One! raises his Speed by six stat ranks to prepare for his Speed-scaling sync move. Triple Arrows Barrage unlocks after the team uses a sync move once, then locks after use; it is not a buddy move you can repeatedly fire without unlocking it again.
- Sygna Suit Cynthia (Aura): She sets Fighting Zone on entry and after sync moves. Her first 6★ EX sync move builds sync buffs and triggers Mega Evolution. Superior Aura Sphere requires taking two attack hits to unlock, so do not assume it is available immediately.
- Riley: Consider Max Knuckle as his Max Move. Each sync pair has one Max Move opportunity, so prepare Fighting Zone and sync buffs before using it.
Battle plan: Set up Rei → use Cynthia’s first sync move → use Riley’s Max Move and Rei’s buddy move in Fighting Zone → use Rei’s sync move. If using Cynthia’s move boosts, include the incoming hits needed to unlock her buddy move in your plan.
Watch out: Rei’s all-target buddy move still hits only one opponent here. Avoid directly comparing its total damage against a three-opponent battle such as the previous Psychic example.
Open this team’s calculation and selected grids ↗
Calculation settings and unmodeled effects
Setup sync: Sygna Suit Cynthia (Aura)& Lucario. Damage sync user: Rei & Decidueye (Hisuian Form). Selected grid energy is listed below.
- Rei &Decidueye (Hisuian Form): 70/70
- Riley &Lucario: 67/70
- Sygna Suit Cynthia (Aura) &Lucario: 69/70
Effects not automatically modeled: Leading a Fighting Spirit, Brawn Sync 5, Space-Time Traveler Triple Arrows, Mighty Command 9, Tough Cookie.
These grids were chosen by comparing automatically generated candidates with no grid selected. They are not guaranteed to optimize battle tempo, gauge use, or Zone uptime. Panels discussed in the article are options to consider; the shared grid may not include all of them together.
4. Bea: support a general-pool damage dealer with two Barrys
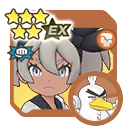 Bea & Sirfetch’dStrike
 Barry & RoseradeSupport
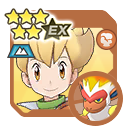 Barry & InfernapeField / EX Sprint
For players who have invested in Bea. Barry with Infernape provides Attack, critical-hit rate, and Fighting Zone; Barry with Roserade provides paralysis and the first Support EX sync move. Barry with Infernape is a Mix Scout sync pair, so this is not an entirely general-pool team.
- Bea: Receive the four-rank Attack increase from I Believe in You!, then fill the remaining ranks with X Attack. For a sync-focused build, consider Inertia and Soften Up 1 on the grid, and raise Speed with X Speed or other support.
- Barry & Infernape: Set Fighting Zone with Fighting Wish. Flaming Rock Smash lowers the opponent’s Defense by four stat ranks and, on its first successful hit, lowers Fighting Type Rebuff by one rank.
- Barry & Roserade: Inflict paralysis with Stun Spore and use his first 6★ EX sync move to build sync buffs. Afterward, advance the countdown while watching gauge use and animation time, including repeated Stun Spore attempts against the paralyzed target.
Battle plan: Buff Bea’s Attack and critical-hit rate and inflict paralysis → use Roserade Barry’s first sync move → set Fighting Zone and lower Defense → use Bea’s sync move. If you want Supereffective ↑ Next on the sync move, avoid consuming it with Meteor Assault after applying it.
Watch out: A 6★ EX Strike sync move still only hits one target in a single-opponent battle. Once the main setup is complete, compare one more setup action against bringing the next sync move forward.
Open this team’s calculation and selected grids ↗
Calculation settings and unmodeled effects
Setup sync: Barry& Roserade. Damage sync user: Bea & Sirfetch’d. Selected grid energy is listed below.
- Bea &Sirfetch’d: 66/70
- Barry &Roserade: 26/70
- Barry &Infernape: 69/70
Effects not automatically modeled: Who’s Got Time to Count?!, Headstrong and Reckless.
These grids were chosen by comparing automatically generated candidates with no grid selected. They are not guaranteed to optimize battle tempo, gauge use, or Zone uptime. Panels discussed in the article are options to consider; the shared grid may not include all of them together.
Other damage dealers and support options
Bianca (Champion) & Virizion can lower Fighting Type Rebuff by two ranks with their buddy move. Consider using them as the main damage dealer or as support for another physical Fighting pair. If you build around special damage, such as Sygna Suit Bede & Iron Valiant, replace Defense-focused support with Sp. Def reduction and special move boosts instead.
When your score stalls, check the setup before each sync move
- Meet the damage conditions.Check Attack or Sp. Atk, critical-hit rate, enemy Defense or Sp. Def, and grid conditions. For Hop, also check enemy Defense and both sides’ Speed.
- Check remaining Zone and sun duration.If they expire just before a big attack, move the refresh later in your plan.
- Check which attack consumes Supereffective ↑ Next.If you want to use it on a sync move, change the order so a regular attack or buddy move does not consume it first.
- Compare whether you can shorten setup.Compare another small damage increase against advancing the countdown enough to use one more sync move. Paralysis activation is random, so the same plan can produce different scores.
- Record your battle score.Record the first sync user, when you set the Zone, and the number of sync moves used. This makes it easier to choose one change for your next attempt.
Find a team for your own roster
Open Team Firepower Explorer ↗
| Setting | Single-opponent settings |
|---|---|
| Damage to maximize | Damage to one target |
| Index to maximize | Damage sync plus three attacks |
| Attack move type | Fighting |
| Remaining opponents / starting sync buffs | 1 opponent / 0 |
| Supereffective / non-supereffective damage disabled | Both ON |
| Special rule | Use “None” for the standard Damage Challenge. For a different event with a damage-reduction rule, match that rule instead. |
| Investment | Use your actual move levels, 6★ EX status, EX roles, and sync grids. |
Fix your main damage dealer and start with one damage dealer. Then compare two and three using the same conditions. Use “Exclude as unowned” to remove pairs you do not own. For a three-opponent round, select total damage across all opponents and set the remaining opponent count to three.
The shared links evaluate one attack per pair and a sync move.The firepower index does not reward faster countdown cycling through failed paralysis attempts. Choose based on more than damage-dealer count or the index. Review actions until the next sync move with the Sync Move Countdown Optimizer, and adjust individual hits with the Damage Calculator.
Assumptions and sources
This guide was prepared on October 15, 2026 for a Fighting-weak, single-opponent battle. The opponent name, event end time, and enemy Defense are omitted because the current in-game screen has not been verified. The examples use our October 14, 2026 data and the four fixed teams above.
For each team, we compared no grid with automatically generated regular-move, sync-move, and balanced grid candidates. This is not an exhaustive optimization across every pair and grid. Enemy Defense and Sp. Def, damage rolls, action time, gauge balance, and some conditional multipliers are omitted, so the index cannot be converted into a battle score. Check the assumptions and unmodeled damage effects in the shared result too.
See the official Damage Challenge instructions. Non-supereffective attacks deal zero damage, even if they bypass damage-reducing passives. The regular battle changeover is Tuesday and Friday at 3:00 p.m. JST. Follow the current in-game display for the opponent and any special rules.